This piece is a part of a series of guides about encryption for media makers; take a look at the full collection here. We recommend you review our introduction to encryption piece for pro-tips and a technical glossary before proceeding with the step-by-step instructions below.
Looking for a different tool? We have guides for VeraCrypt and Bitlocker To Go, too.
Table of Contents
- What is Disk Utility? How can I use it?
- So you want to protect the data on your external hard drive and other storage devices…
- Encrypting external storage devices on Disk Utility
- So you want to create a secure space for sensitive files on your computer…
- Creating encrypted disk images on Disk Utility
1. What is Disk Utility? How can I use it?
macOS users can use Disk Utility to wipe and encrypt external drives, and to create encrypted disk images on a computer’s local file system. You can find Disk Utility in a Spotlight search, or in the Finder application via Applications > Utilities.
2. So you want to protect the data on your external hard drive, and other storage devices…
Let’s imagine that you are starting work on a feature-length documentary film. You will be capturing footage for the next couple of years for the project. Some of this footage contains first-person interviews with sensitive sources. You want to take extreme care to make multiple copies, or backups, of this integral footage, while also protecting the sources with added technical safeguards placed on the backup hard drives.
Your solution? Creating encrypted external drives for medium- to long-term storage
During every stage of a film project, there remains unused footage, cuts, and other material that requires safekeeping. Some film teams face a high risk that their storage devices could be confiscated while shooting in the field. When you encrypt storage media, you are protecting the data it will hold, erecting barriers that make it difficult and costly for unwanted third parties to access.
3. Encrypting external storage devices on Disk Utility
Step-by-step workflow:
Open Disk Utility and insert the external drive you want to format for encryption.
We’ll be starting this example with a 64GB Memorex USB drive, formatted with an unencrypted partition named UNKNOWN.
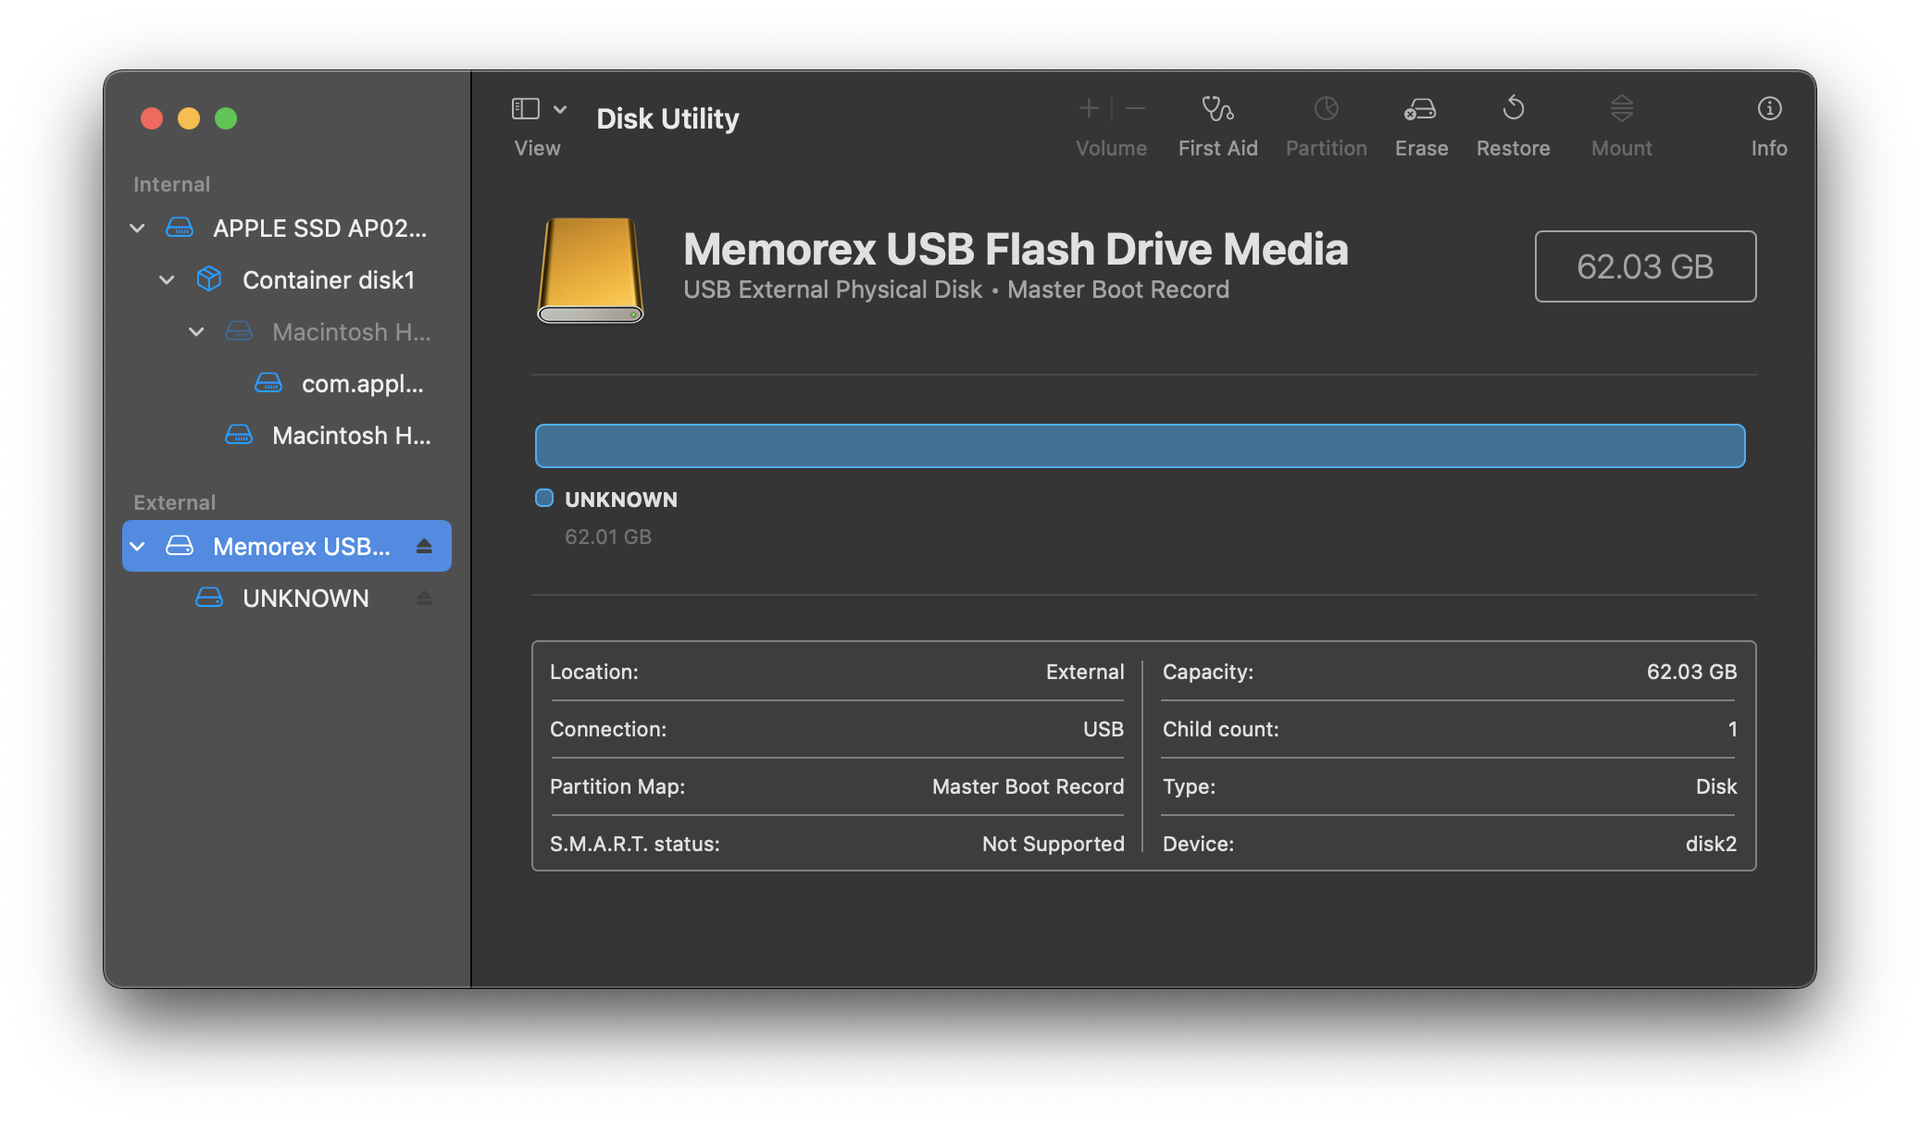
The drive in this example has already been formatted with a GUID Partition Map scheme, a prerequisite for encryption in macOS. If your storage device isn’t already formatted in this scheme, that’s okay. Just go ahead and format it from its current state to GUID Partition Map scheme and proceed. Here's how:
Select the top-level device name (Memorex USB Flash Drive Media in this example) and select the “Erase” option at the top of the utility window. You may need to first enable viewing all devices in Disk Utility by navigating to “View” and selecting “Show All Devices.” This is important: This designates that all the data on your entire external drive will be erased and reformatted to an encrypted state, not just a volume within it.
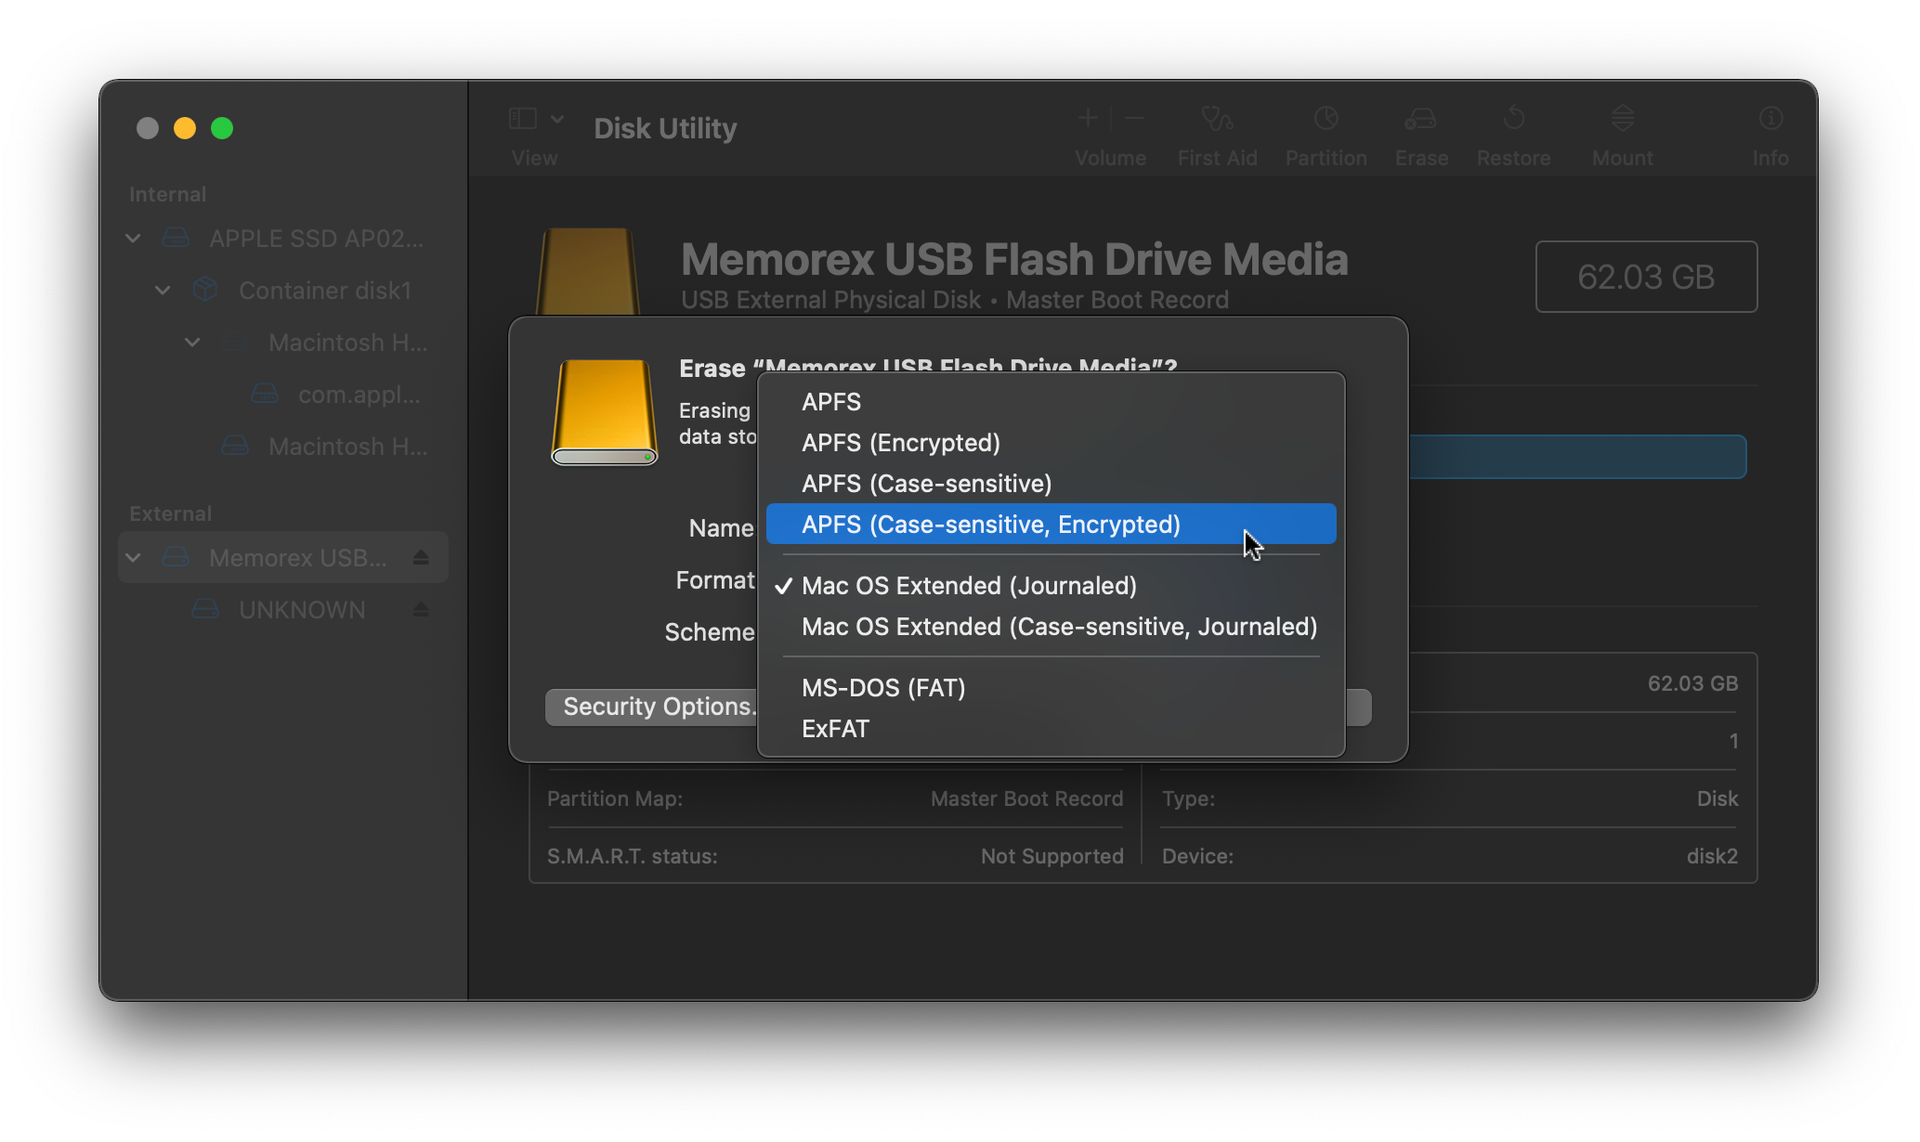
That will bring you to the formatting options you see above: Name, Format, and Scheme.
Name: You can name your encrypted device whatever you’d like. For this example, we’ll use the name project.
Format: Select APFS (Case-sensitive, Encrypted).
Scheme: To encrypt devices in Disk Utility, you’ll need to use GUID Partition Map.
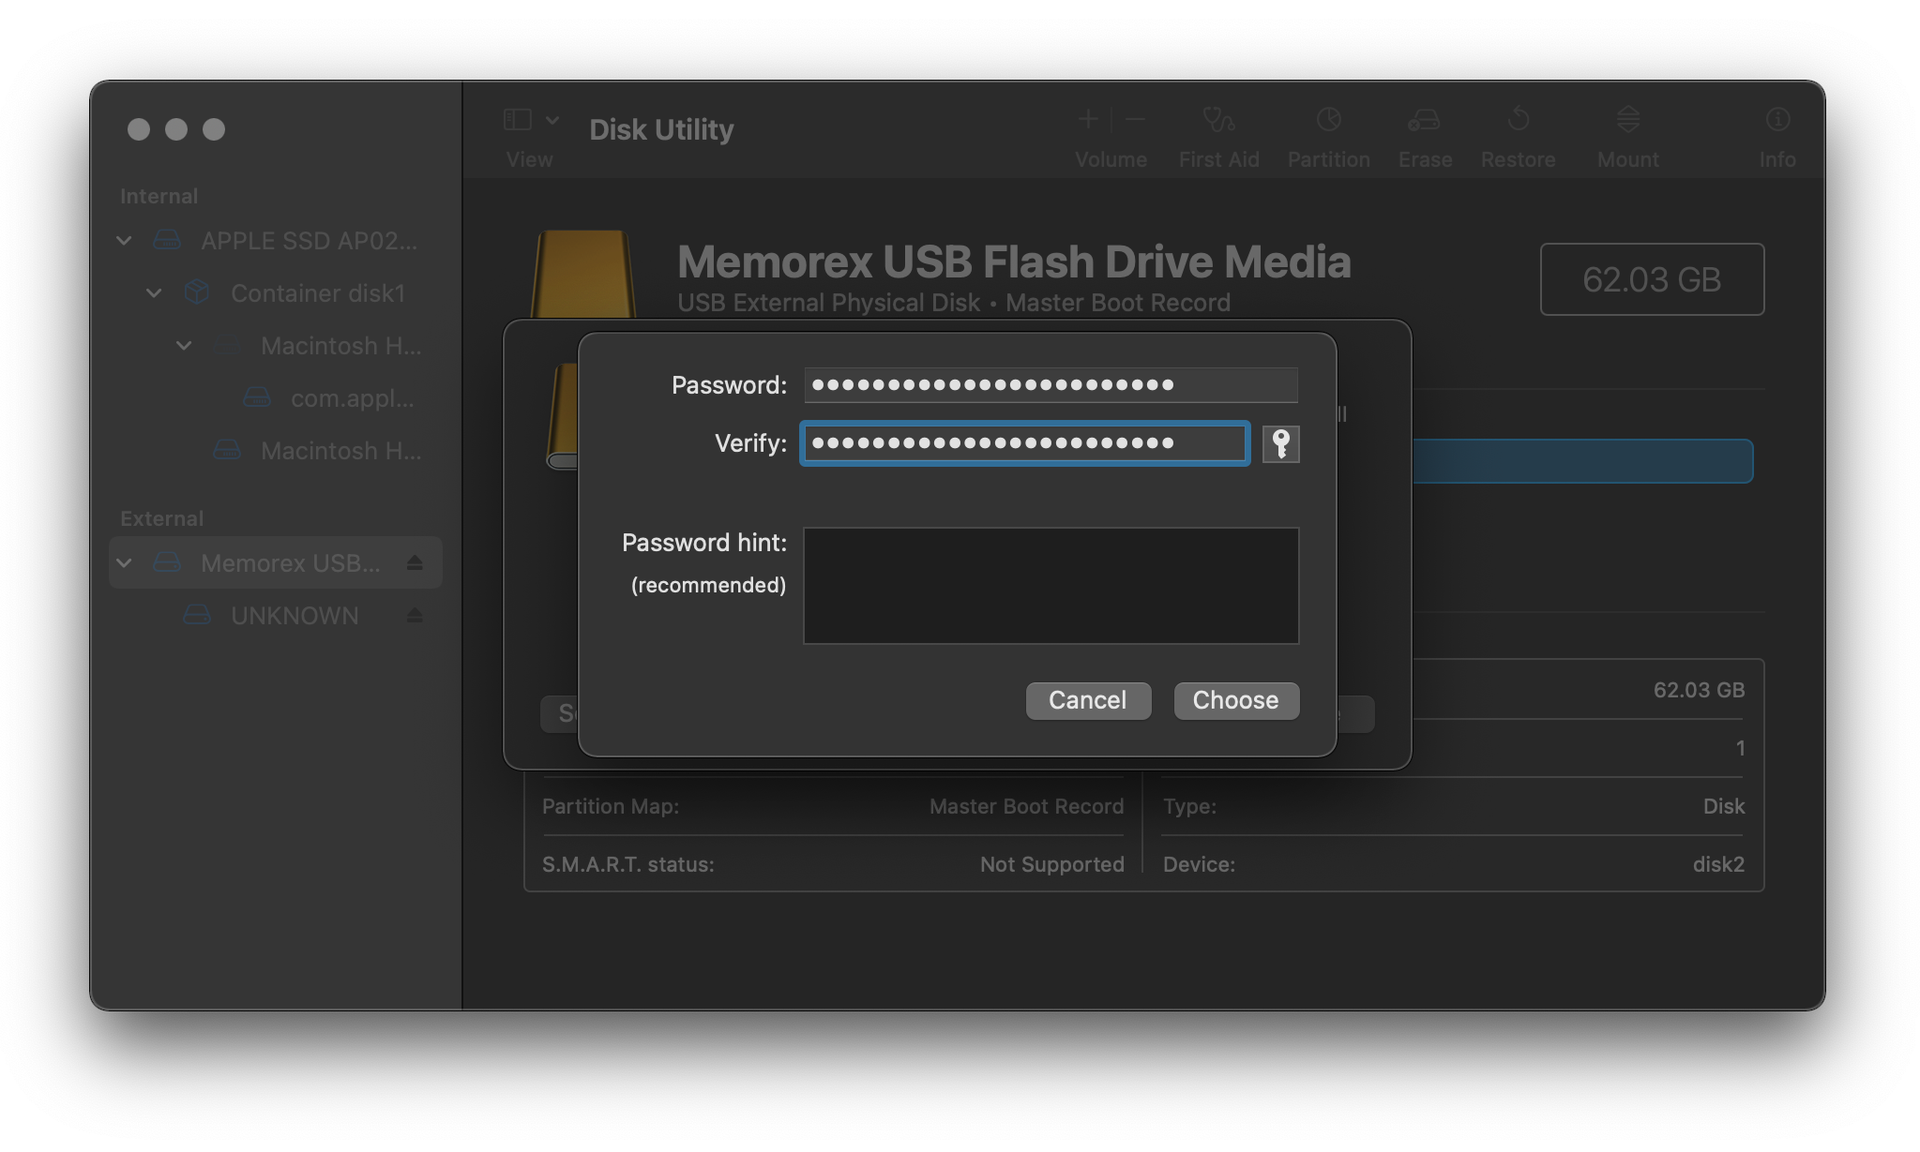
You’ll be asked to enter your encryption passphrase. Use a long, unique passphrase for this step. Make sure you memorize it, write it down in a secure physical location, or store it in your password manager tool for safekeeping.
After choosing your passphrase, click Erase.
Once formatting is complete, you’ll see your encrypted drive name on the left hand navigation of your Disk Utility window.
Just like you normally would, eject the newly encrypted drive before physically disconnecting it.
Now let’s re-insert the drive, and go through the workflow for decrypting and adding files to it.
Open up a Finder window and insert your encrypted drive. You’ll be prompted to enter your passphrase before you can read and make changes to its contents.
Once you’ve mounted your encrypted volume, you can begin adding files to your drive. We’ll copy over a folder containing raw master footage for long-term backup storage. Once you’re done, go ahead and unmount the volume by hitting the eject icon on the left side of your Finder window.
4. So you want to create a secure space for sensitive files on your computer…
You might simply want to create a password-protected container you can throw onto a cloud service before travel. In some cases, you might need to restrict local access to a set of files on a shared computer. These types of cases present the perfect opportunity to incorporate encrypted file containers into your data protection workflow.
Your solution? Encrypting containers on your computer to safeguard files
It might sound like overkill to create an encrypted container, or “disk image,” within your computer’s hard disk (assuming the hard disk is already fully encrypted, which it should be), but there are some novel ways a media maker might want to leverage this utility.
5. Creating encrypted disk images on Disk Utility
Step-by-step workflow:
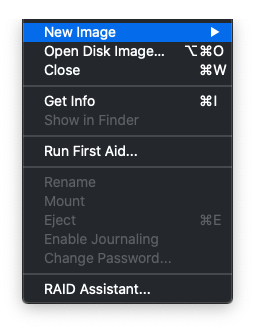

Let’s say you want to move a set of files on your desktop to an encrypted disk image for safekeeping. First, open up Disk Utility and navigate to File > New Image > Blank Image.
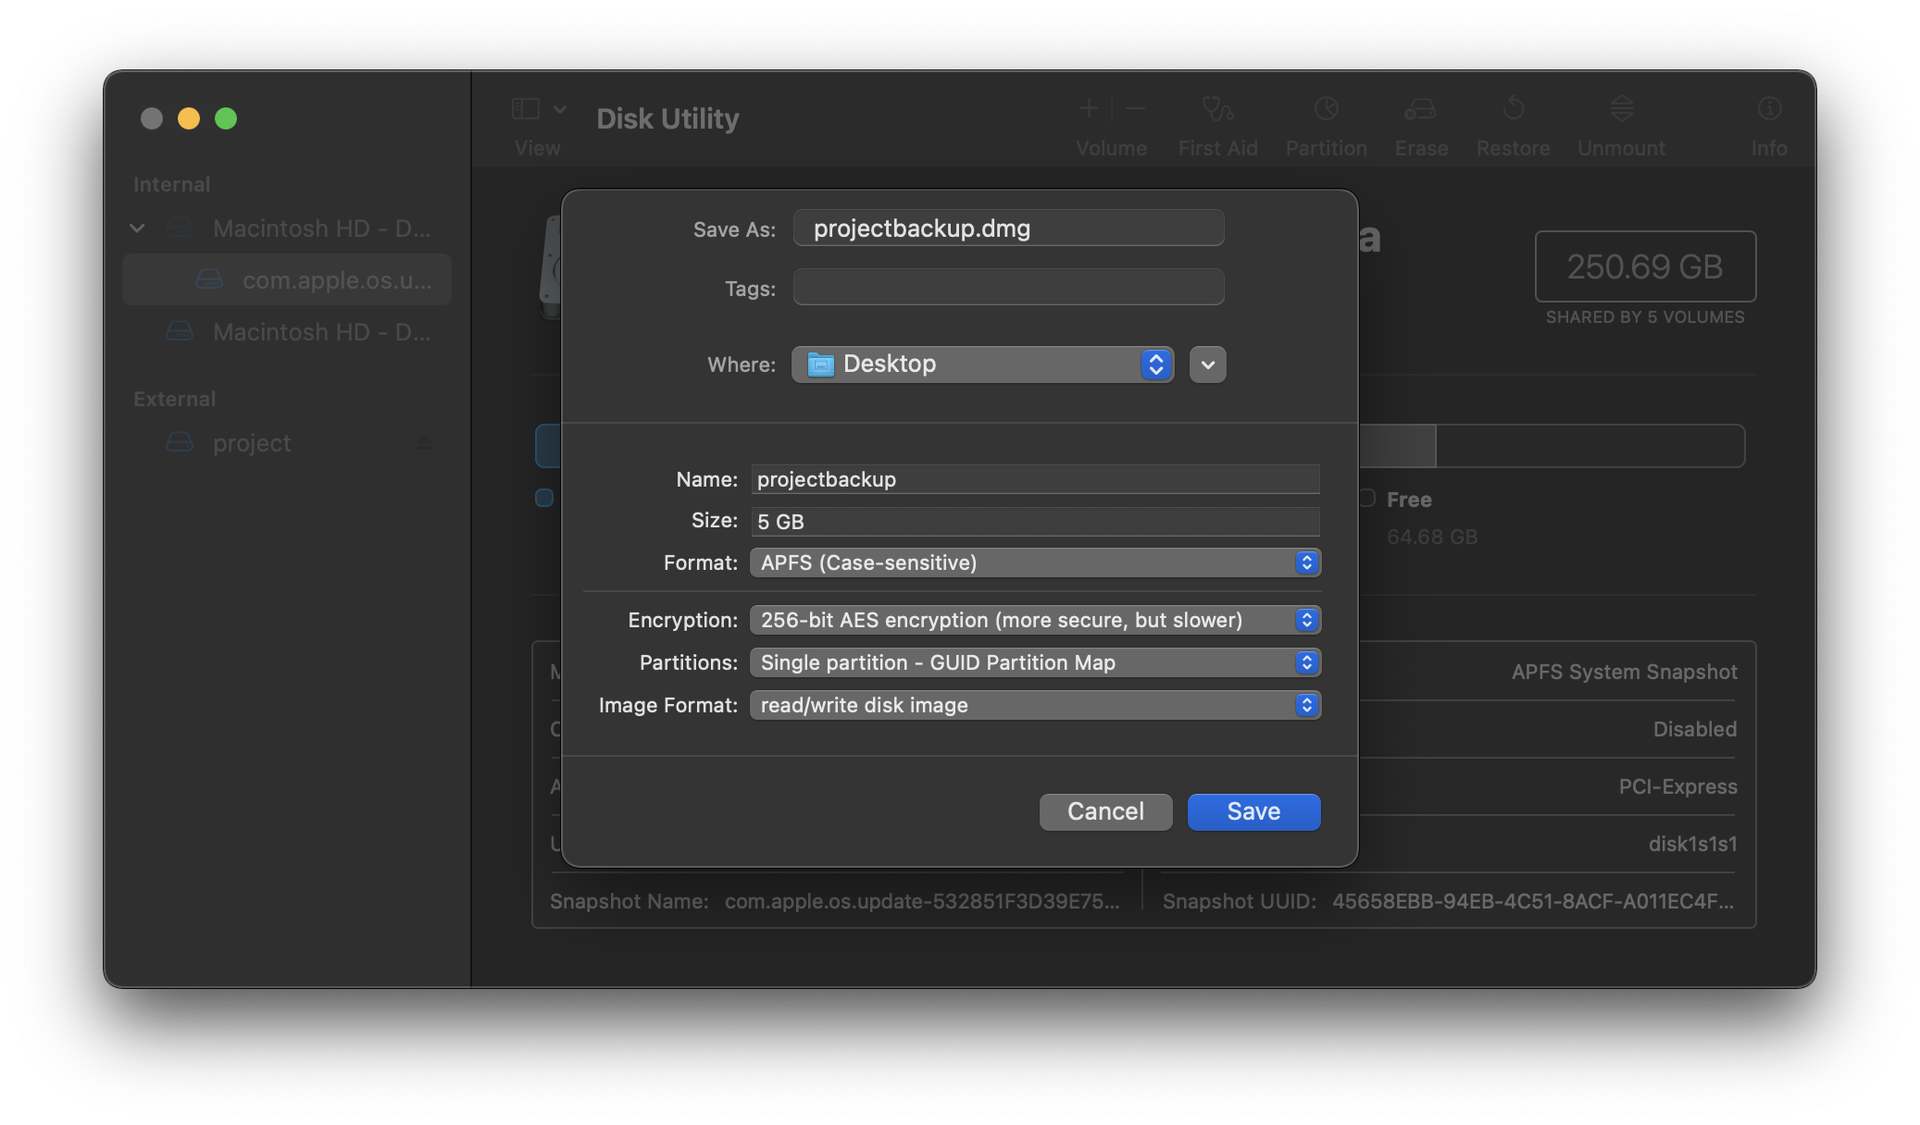
Depending on how you plan to use the disk image, your configuration may differ slightly from what's used in this example.
Size: The default image size in Disk Utility is 100MB. We bumped it up to 5GB. You can designate any size you’d like so long as your computer has the space for it. You can always resize the image at any time through the top navigation in Disk Utility, under Images > Resize.
Format: The best format for handling files on the newest versions of macOS is APFS (Case-sensitive). Assuming you won’t be taking this disk image between operating systems, you can stick with the default.
Encryption: Opt for the strongest encryption option, 256-bit AES encryption. Don’t forget to use a strong passphrase to lock your data down. Memorize your passphrase or note it in a secure space so that you don’t lose access to your data.
Partition: You can keep the default, Single partition - GUID Partition Map.
Image Format: Stick with read/write disk image so that you can easily add to and modify the contents of your disk image from anywhere.
Double check that you’ve recorded your encryption passphrase somewhere secure, and go ahead and click Save.
From a Finder window, you should now see your new disk image, named projectbackup.dmg in this example. Double click on it to mount it. You’ll be prompted to enter your encryption passphrase, keeping the Remember my password in my keychain option unchecked.
Once you’ve mounted your disk image, you’ll notice a new volume available under the Devices menu on the left hand of your Finder window. This is where you’ll add and modify the files on your disk image. When you're done, you can unmount it and encrypt its contents by hitting the eject icon in your Finder window, or by dragging the mounted volume (not the DMG file) into the Trash.


