This piece is a part of a series of guides about encryption for media makers; take a look at the full collection. We recommend you review our introduction to encryption piece for pro-tips and a technical glossary before proceeding with the step-by-step instructions below.
VeraCrypt not the tool you're looking for? We have guides for Disk Utility and Bitlocker To Go, too.
Table of Contents
- What is VeraCrypt? How can I use it?
- So you want to protect the data on your external hard drive, and other storage devices…
- Encrypting external storage devices on VeraCrypt
- So you want to create a secure space for sensitive files on your computer…
- Encrypting file containers on VeraCrypt
What is VeraCrypt? How can I use it?
VeraCrypt is an open source volume management tool compatible with macOS, Windows, and Linux systems.
If you’re not already a VeraCrypt user, download the software from the developer’s website. Just like a physical signature, the developer leaves files that only they can sign using cryptographic keys on their website. To ensure we have a legitimate installation file (and not one that’s been tampered with) we should confirm that these files correspond to their encryption keys and signatures.
Because it is available on all major operating systems (macOS, Linux, and Windows), VeraCrypt is an ideal tool for teams geared toward cross-platform sharing, or sharing encrypted storage in a mixed team of Mac and PC users.
MacOS users listen up — If your team is composed entirely of mac users, you don’t have to worry about sharing across different operating systems and can stick with Disk Utility, which is already installed on your device. You can refer to our Disk Utility guide to get started.
If you are a macOS user concerned about cross-platform sharing, or have otherwise decided to use VeraCrypt, you’ll have to install an additional piece of software before you can start using it. Download and install OSXFuse in order to manage some file formats in VeraCrypt that aren’t natively supported in macOS.
So you want to protect the data on your external hard drive, and other storage devices…
Let’s imagine that we are starting work on a feature-length documentary film. We will be capturing footage for the next couple of years for the project. Some of this footage contains first-person interviews with sensitive sources, and we want to take extreme care to make multiple copies, or backups, of this integral footage. Likewise, we want to protect our source with added technical safeguards placed on the backup hard drives.
Your solution? Creating encrypted external storage for medium- to long-term storage
During every stage of a film project, there remains unused footage, cuts, and other material that require safekeeping. For some film teams, the risk of confiscation of storage devices is extremely likely while shooting in the field. When we encrypt storage media, we are protecting the data it will hold, erecting barriers that make it difficult and costly for unwanted third parties to access.
Encrypting external storage devices on VeraCrypt
Step-by-step workflow:
When you start up VeraCrypt, you will be greeted by the VeraCrypt volume manager, your one-stop shop to mount, manage, and unmount up to 20 local and external VeraCrypt volumes.
We’ll circle back to managing your volumes at the end of the demo, but for now let’s hit the “Create Volume” option.
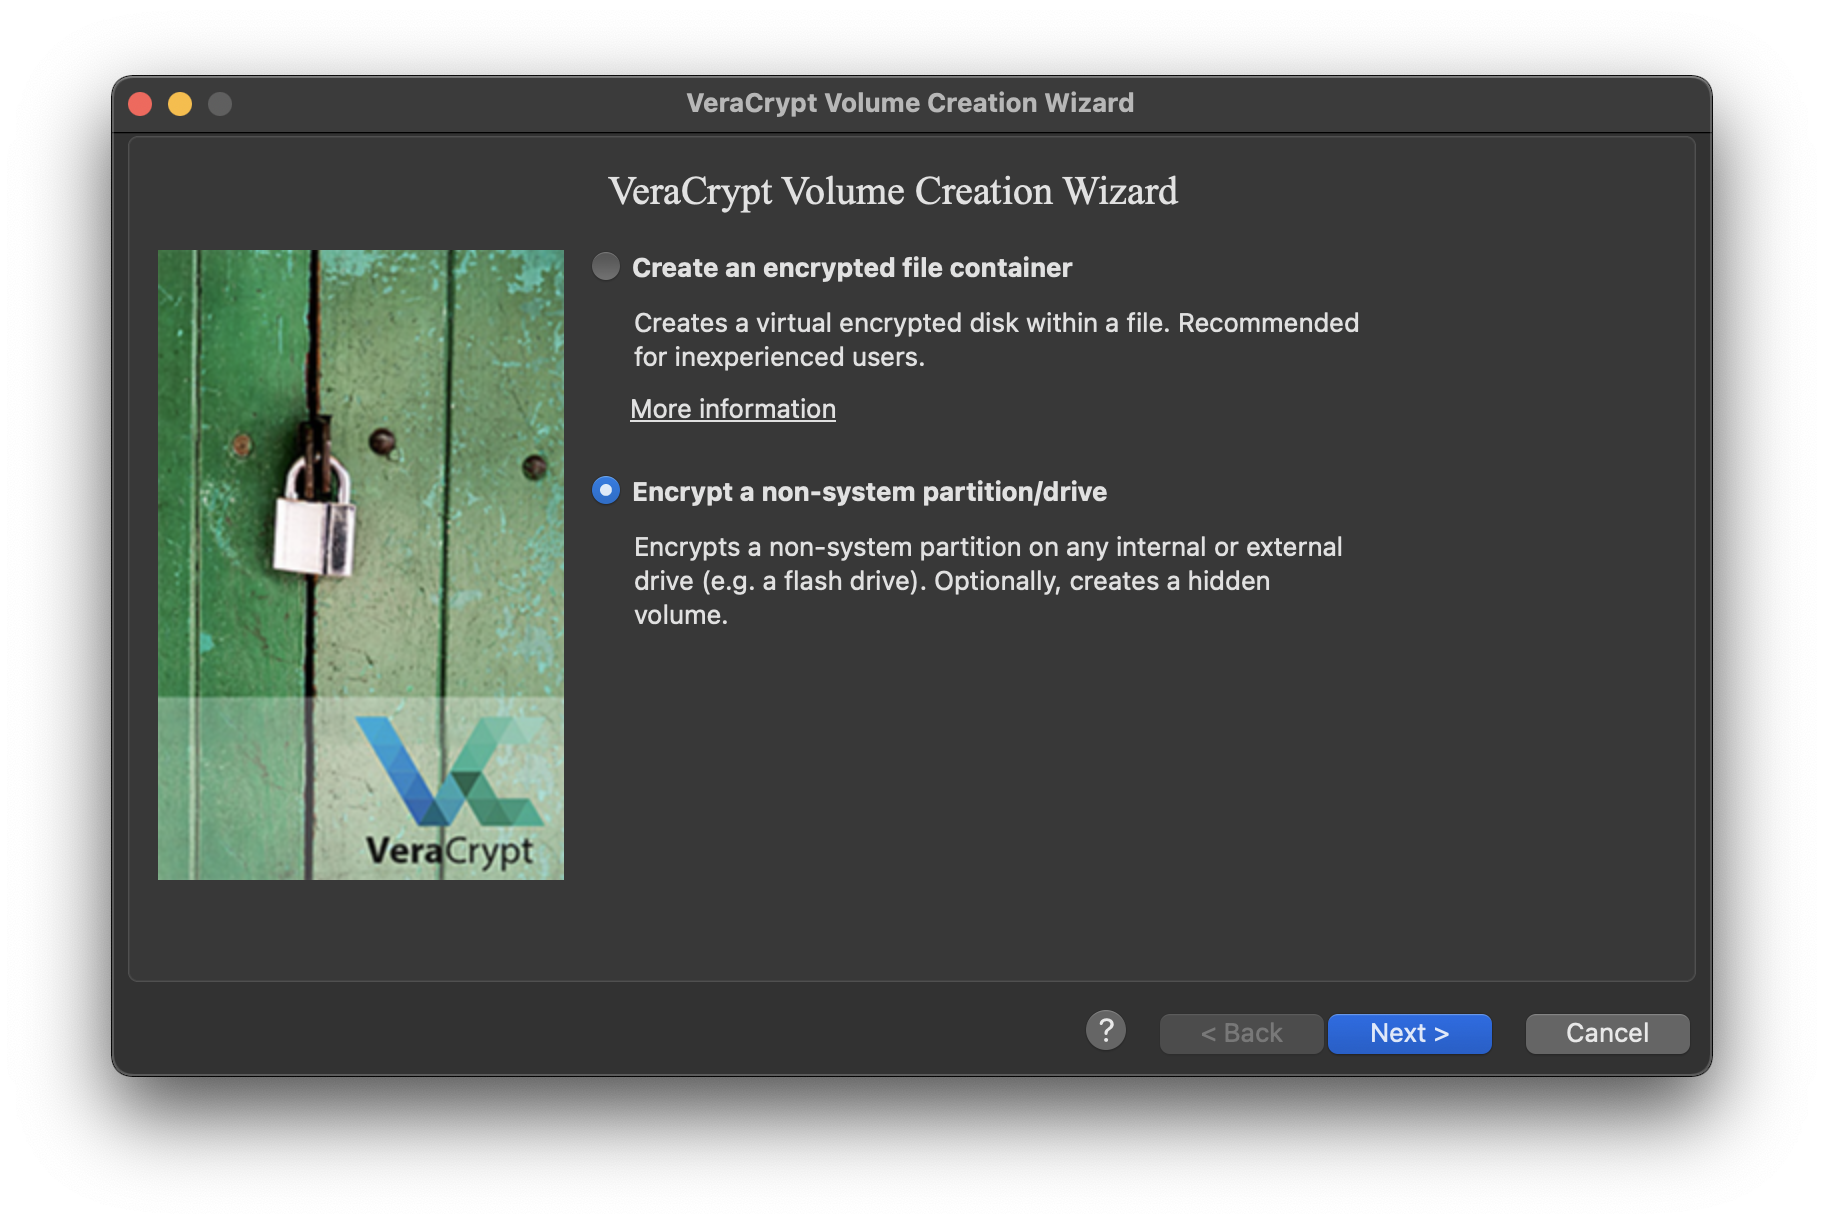
The VeraCrypt Volume Creation Wizard gives you two high-level options from the offset.
Create an encrypted file container: This option will guide you through the creation of an encrypted file container. You can think of it like a password-protected folder for sensitive files. It can either live on your computer as a repository for files in active projects. Or you might want to send the file container to a collaborator, or store it on a trusted cloud service.
Encrypt a non-system partition/drive: This option will guide you through the process of formatting entire external storage media drives, or even partitions of external storage media. Other applications of this feature are outside of the scope of this guide.
In this example, we’ll be formatting and encrypting a partition on a USB drive, so we’ll select “Encrypt a non-system partition/drive.”
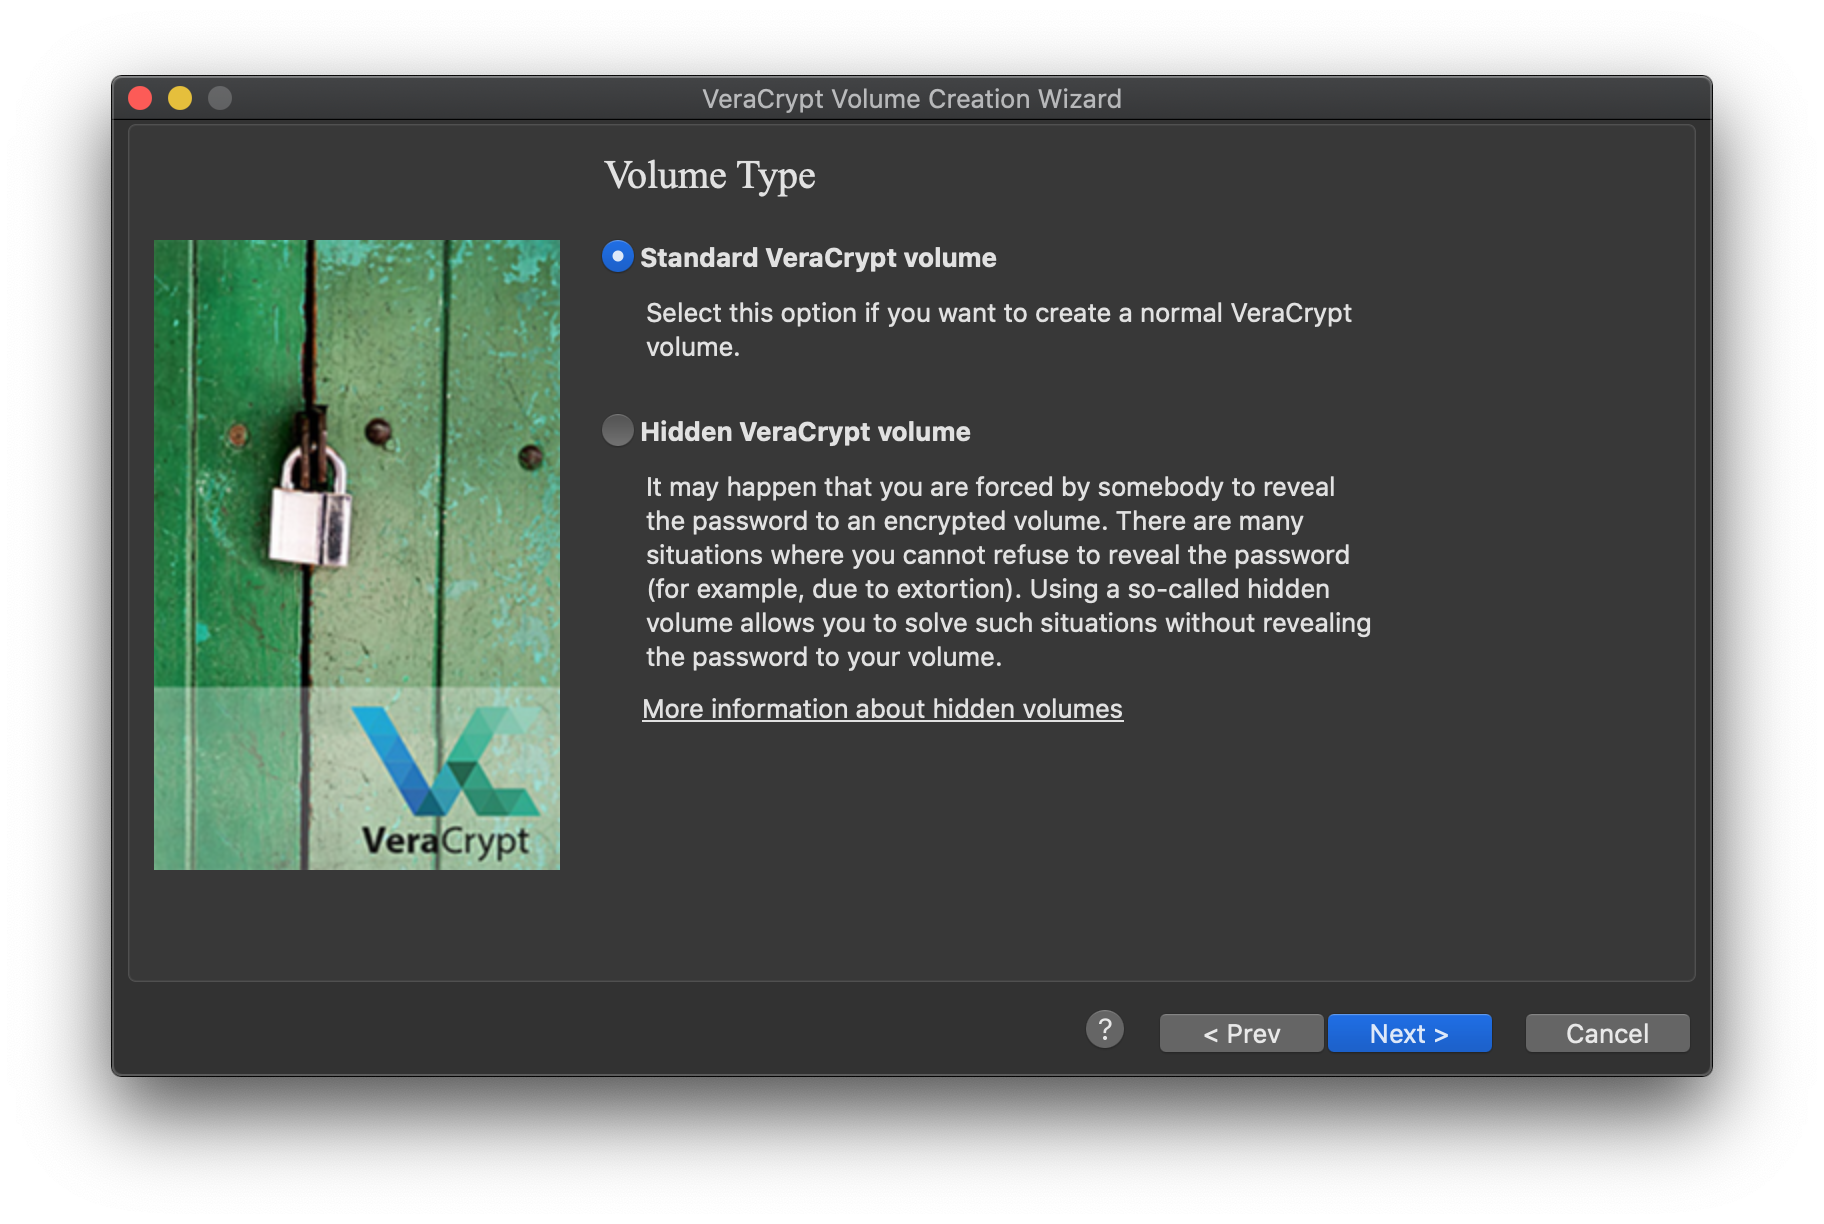
The next step in the Creation Wizard gives you an option to format your storage media as a Standard or Hidden VeraCrypt volume.
The default is a Standard VeraCrypt volume, which will give you all the functionality you need to create encrypted places to store data for media projects.
The Hidden VeraCrypt volume allows you to place high-priority files in a volume configured to appear as free disk space.
A Hidden volume may be appropriate for use in a limited number of circumstances, but planning around these situations requires time, technical expertise, and a legal strategy. If you are interested in exploring applications for Hidden volumes, contact the Freedom of the Press Foundation digital security training team.
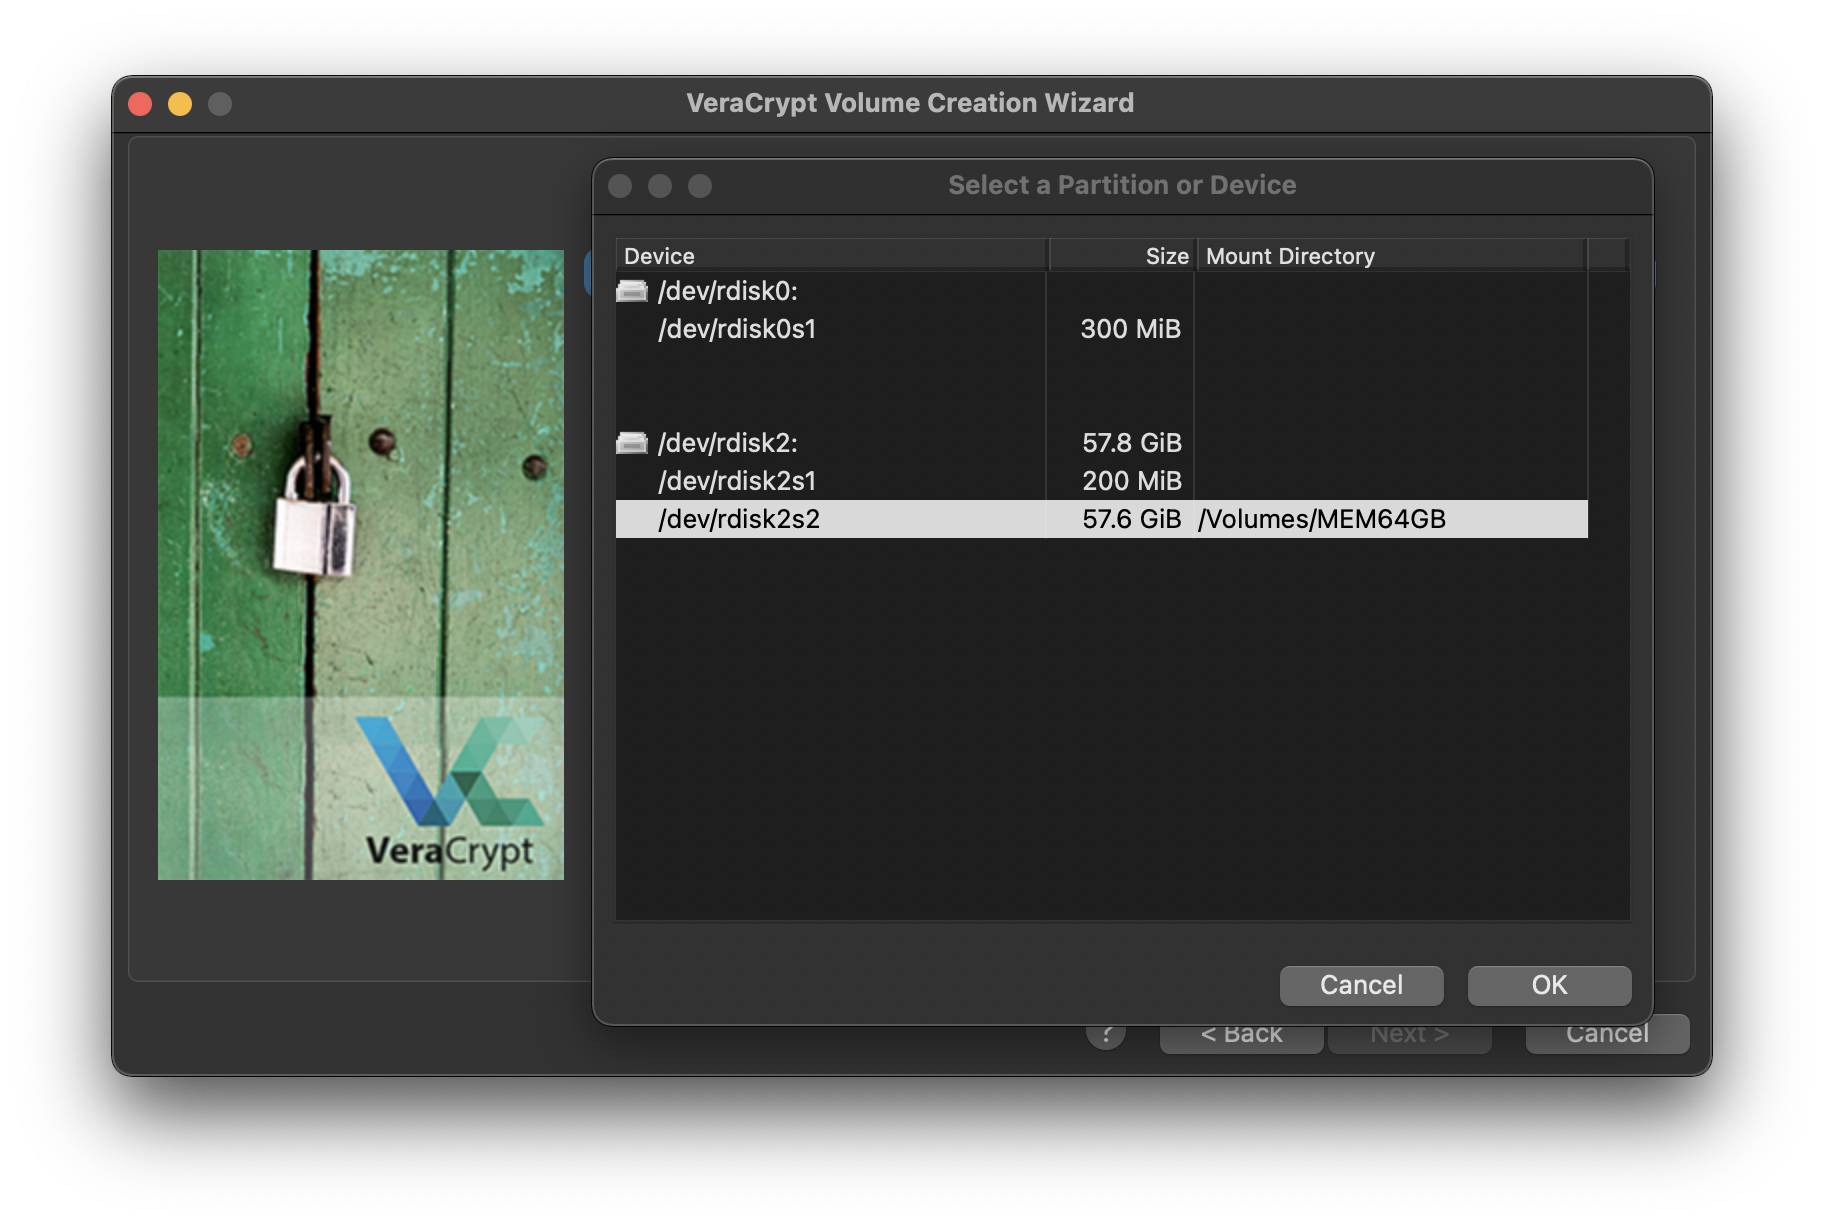
Volume Location: From the Volume Location window, click the “Select Device…” button. This will bring you to a partition selection window. Locate the drive you want to encrypt. The device we're using in this demonstration, labeled /dev/rdisk2 in the device architecture, currently hosts one FAT32 partition, which corresponds to the /dev/rdisk2s2 entry. We'll select that partition to format as a standard VeraCrypt volume. Your target device location will likely be different.
About preparing your device to be formatted on VeraCrypt: After testing, we found that starting with a FAT32-formatted partition produced the best results on VeraCrypt, with the fewest hiccups. If you want to encrypt the top-level device, instead of a partition or volume within it, you'll need to clear out the partition table on the device first. A straightforward way to do that is through the GNOME Disks utility on some Linux distributions. If you aren't a regular Linux user, you can use Tails to create a portable Linux environment. If you need assistance, reach out to our digital security training team.
Don’t forget — Every time you format a drive, all the files inside of it will be lost. If you have data on the external storage device you intend to encrypt, make sure you move those files off for safekeeping. You can always move that data back to your drive after it has been formatted.
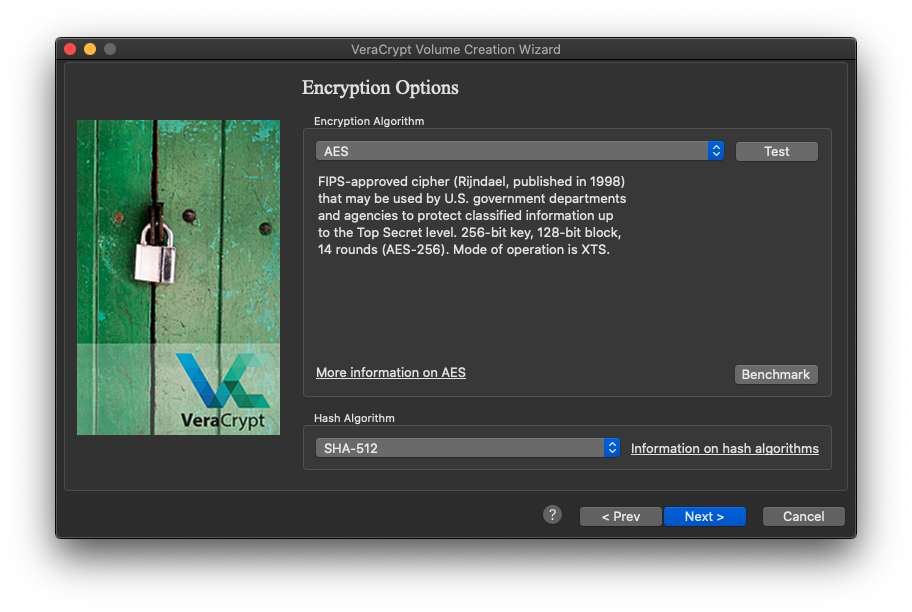
Encryption Options: Confirm your intended device doesn’t contain essential files, and go ahead with the default encryption options. AES and SHA-512.
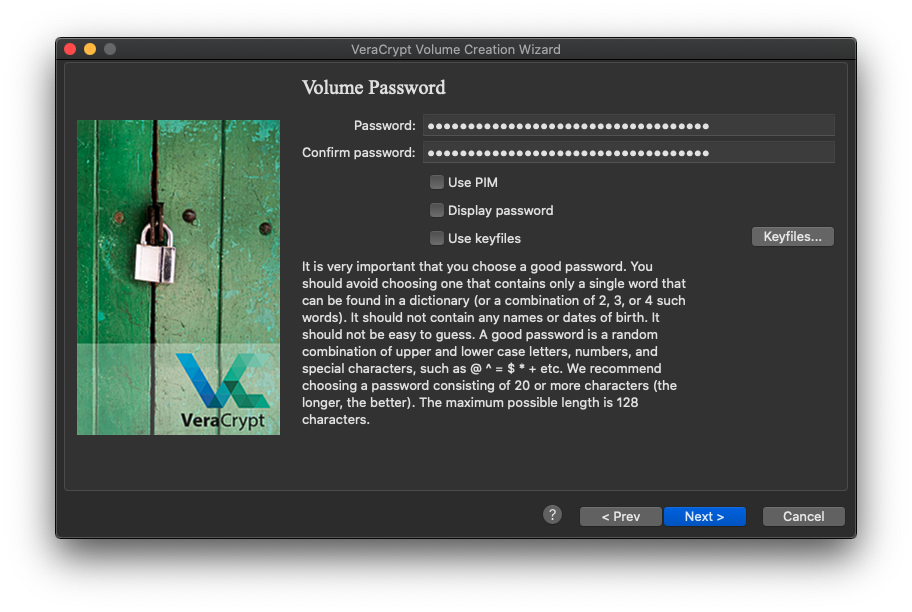
Volume Password: As always, designate a long, unique passphrase for your drive. This is essential to protecting the media you will hold on this storage device.
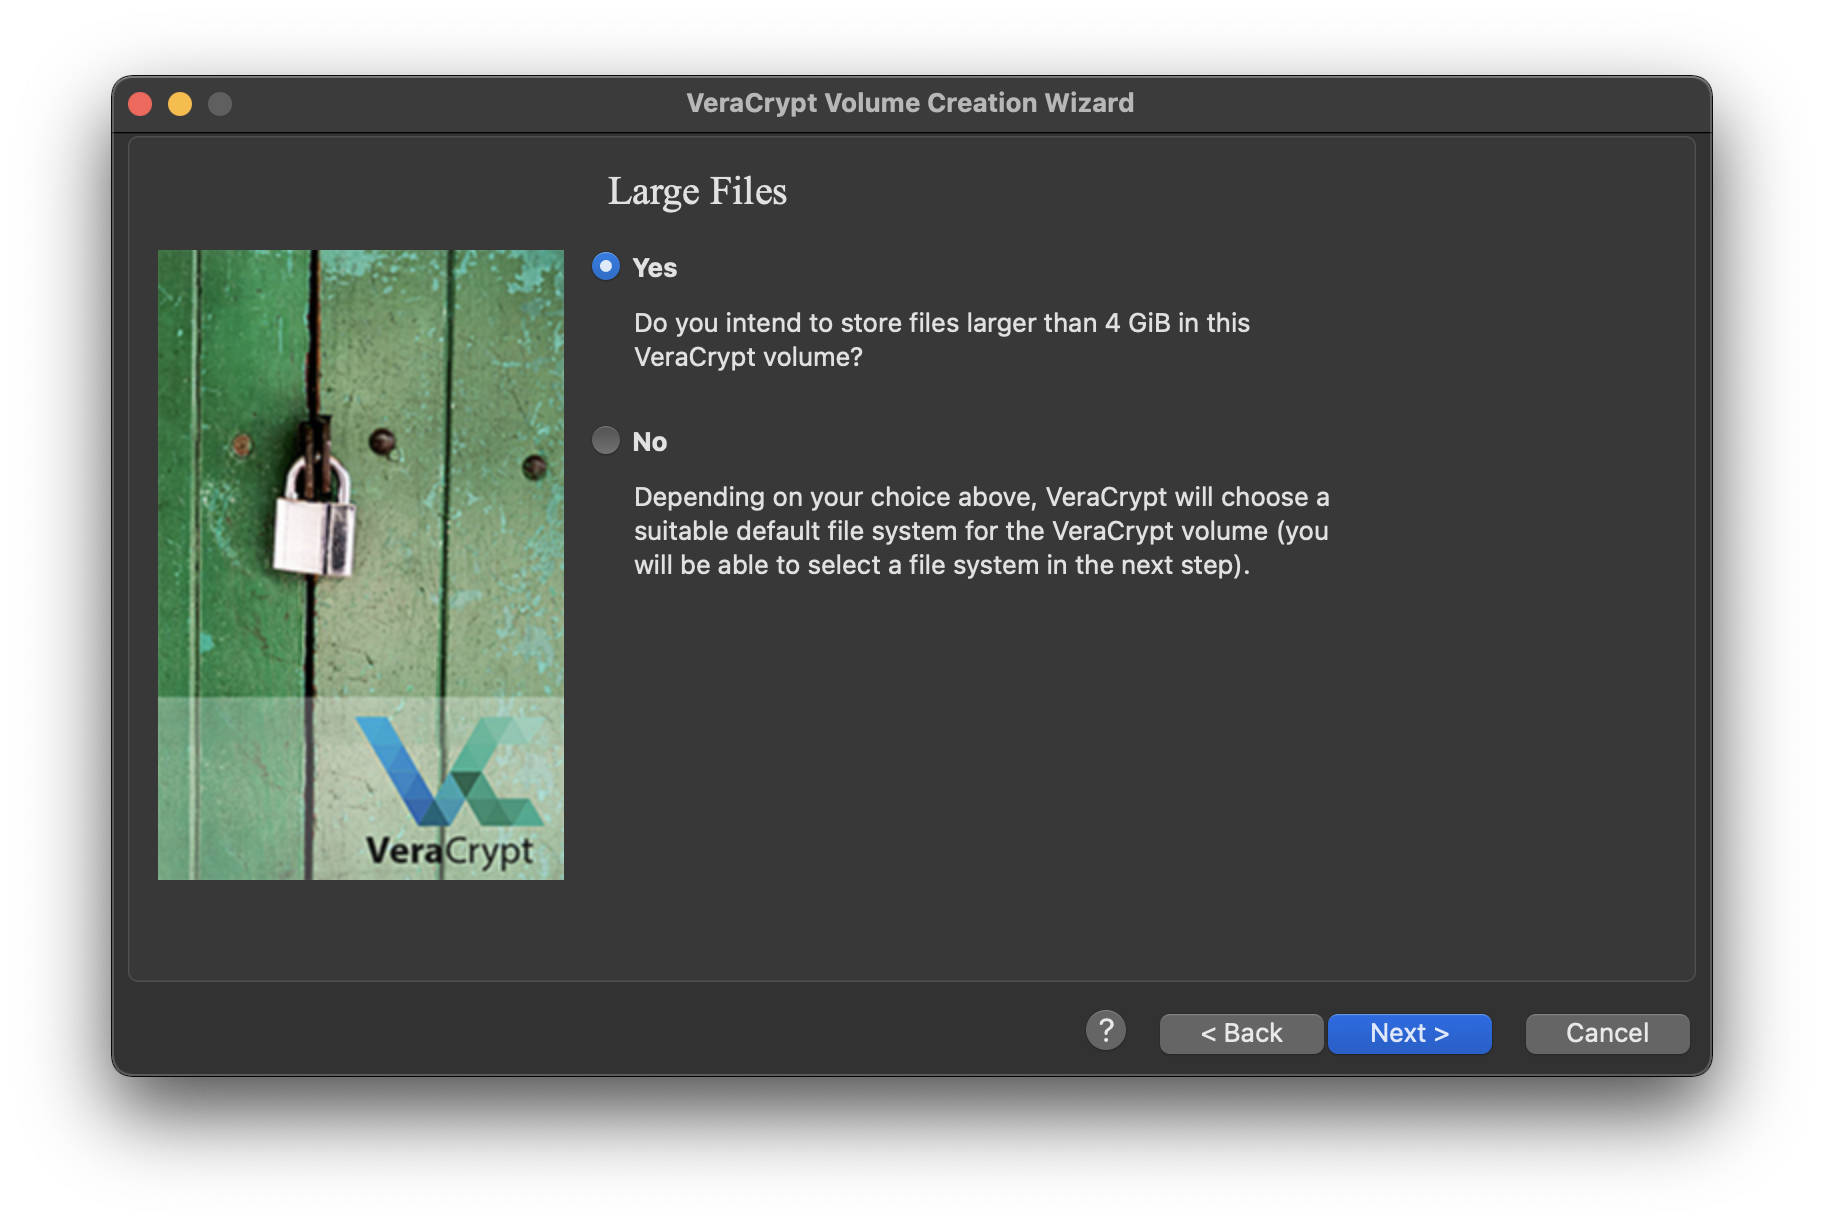
Large Files: Assuming we are going to be working with large media files, we should choose “Yes” on the “Large Files” menu, for storage above 4GB. This choice will give you different formatting options than the default in order to preserve your larger media files. Other projects, say a backup of prospective scripts, might not require such a setup.
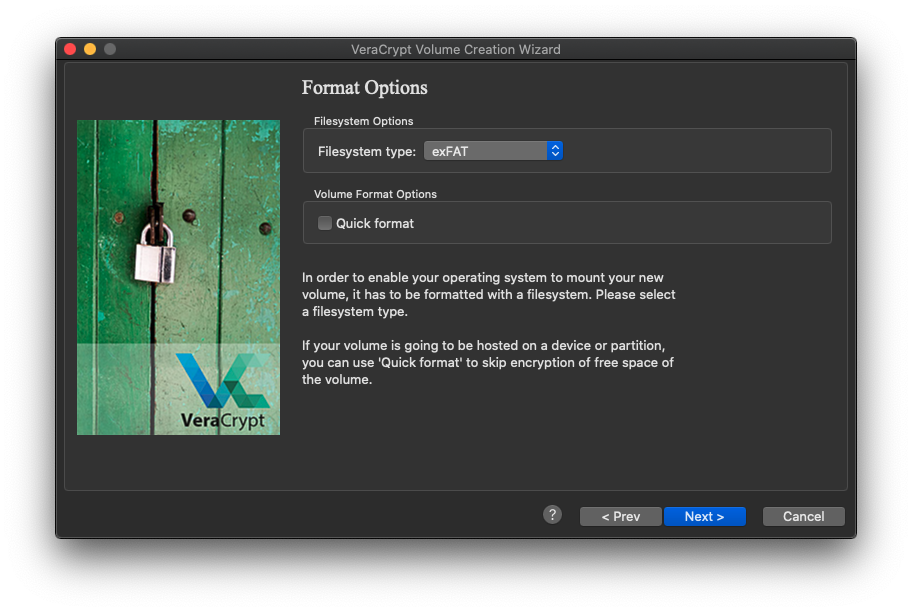
Format Options: Depending on which operating system you’re running VeraCrypt on, you’ll have different format options. For the purposes of this guide, we’ll want to use the exFAT format. Why? It can be read by all major operating systems, and can support large files.
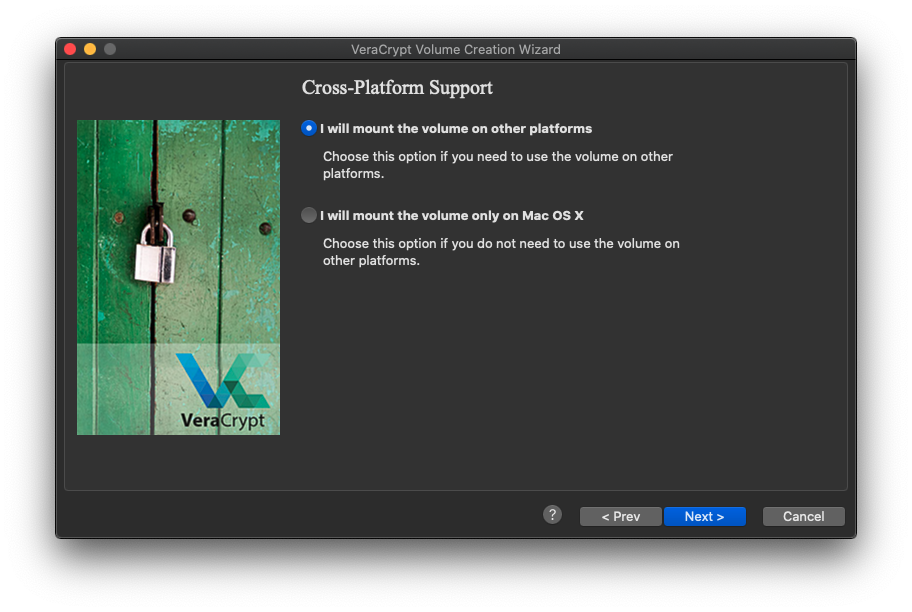
Cross-Platform Support: This step serves to double-check that you have selected the best format option for your use of the drive. Windows and Linux users will see a different menu dialogue, but all users should rest assured that the exFAT format will work for media projects on any operating system.
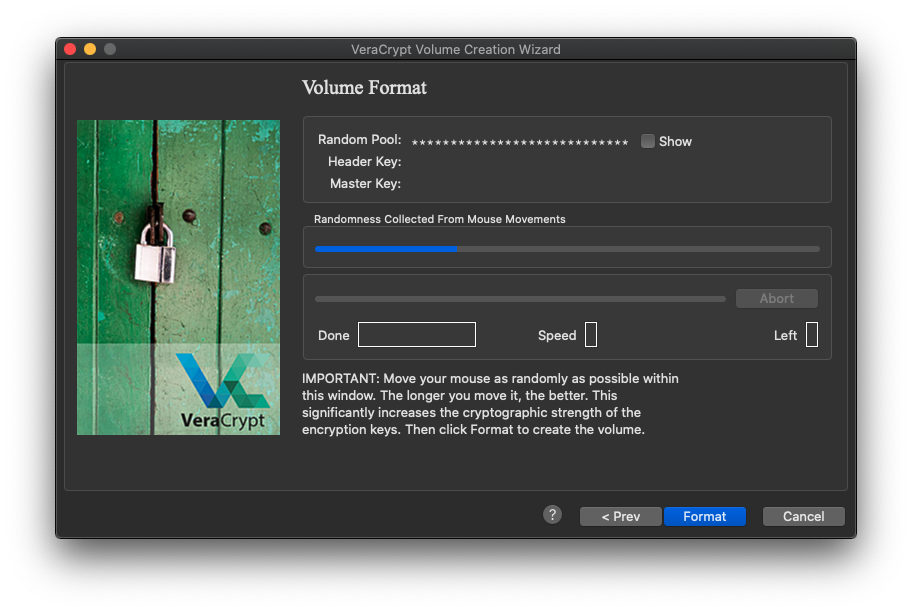
Volume Format: You’ve reached the final window in the Creation Wizard. Double-check that you’ve memorized your encryption password, or saved it in your password manager. Now you’re ready to hit Format, and wait as VeraCrypt does the rest of the work. To increase the randomness of the number generator running the encryption, move your mouse around the application window. The formatting process may take quite a long time, depending on the size and make of the storage media you are encrypting.
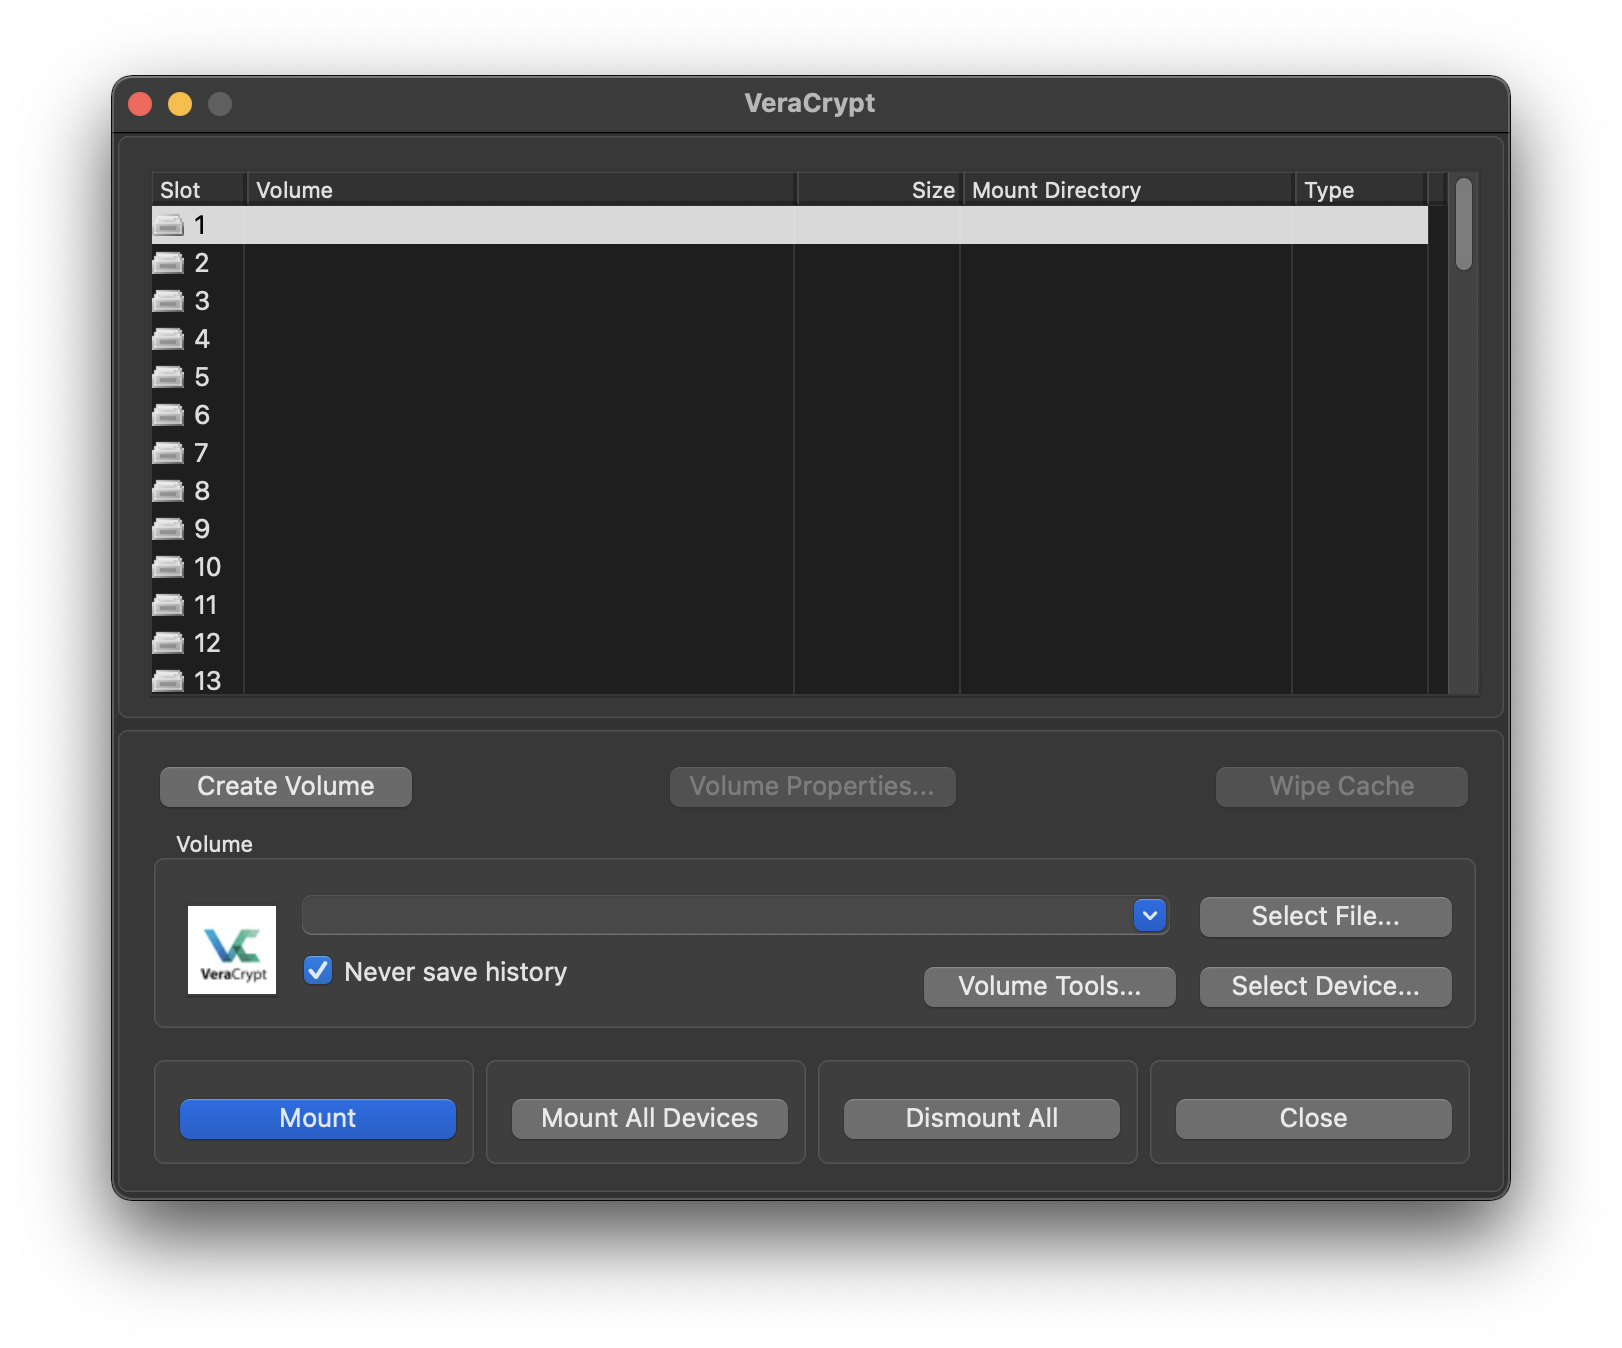
Once your external storage device is finished formatting, you’re brought back to the main VeraCrypt application menu. Let’s go ahead and mount your freshly encrypted drive and load some project files on it. Hit “Select Device” and enter your computer’s administrator password, if prompted for it. Then, choose the partition on your drive you selected earlier from your available options. Next, enter the volume password you chose when you encrypted the drive.
Important note for macOS users — When you plug a VeraCrypt-encrypted drive into your Mac, you may see a notification that the volume is not “readable” by the computer. Don’t worry. Hit “Ignore” on the notification. You’ll be able to read and write to your USB drive’s storage through the VeraCrypt volume manager.
Same goes for Windows — Windows will appear to give your USB drive the same letter as it had before (for example, E:\) but if you try to navigate to that drive letter in Explorer, you will see a notification asking if you’d like to format it. You should ignore this notification, since formatting will delete the encrypted VeraCrypt partition. You’ll be able to read and write to your USB drive’s storage after you use the VeraCrypt volume manager to mount it under a different drive letter (for example, G:\ instead of E:\).
When you've inserted your encrypted drive and opened up the VeraCrypt volume manager, you're ready to proceed. Hit “Select Device” on the volume manager window and choose your storage device from the available options. Next, enter your device password.
With your encrypted VeraCrypt volume mounted, you can now access the drive through Finder. On this system, we’ll be working with a Finder window under “Devices.” We’ve added some project files for safekeeping. When you’re done, go ahead and “Dismount” the device from the VeraCrypt application window.
So you want to create a secure space for sensitive files on your computer…
You might simply want to create an encrypted container you can throw onto a cloud service before travel. You might need to restrict local access to a set of files on a shared computer. You might want to compartmentalize project assets on your work device. You might want to take precautionary steps against data leakage during a superficial search of your unlocked device.
Your solution? Encrypting containers on your computer to safeguard files
It might sound like overkill to create an encrypted image within your hard disk (assuming the hard disk is already fully encrypted, which it should be), but there are some novel ways a media maker might want to leverage this utility.
Encrypting file containers on VeraCrypt
Step-by-step workflow:
If you’d like to move files into an encrypted container using Veracrypt, open up the application. In the volume manager window, select “Create Volume.”
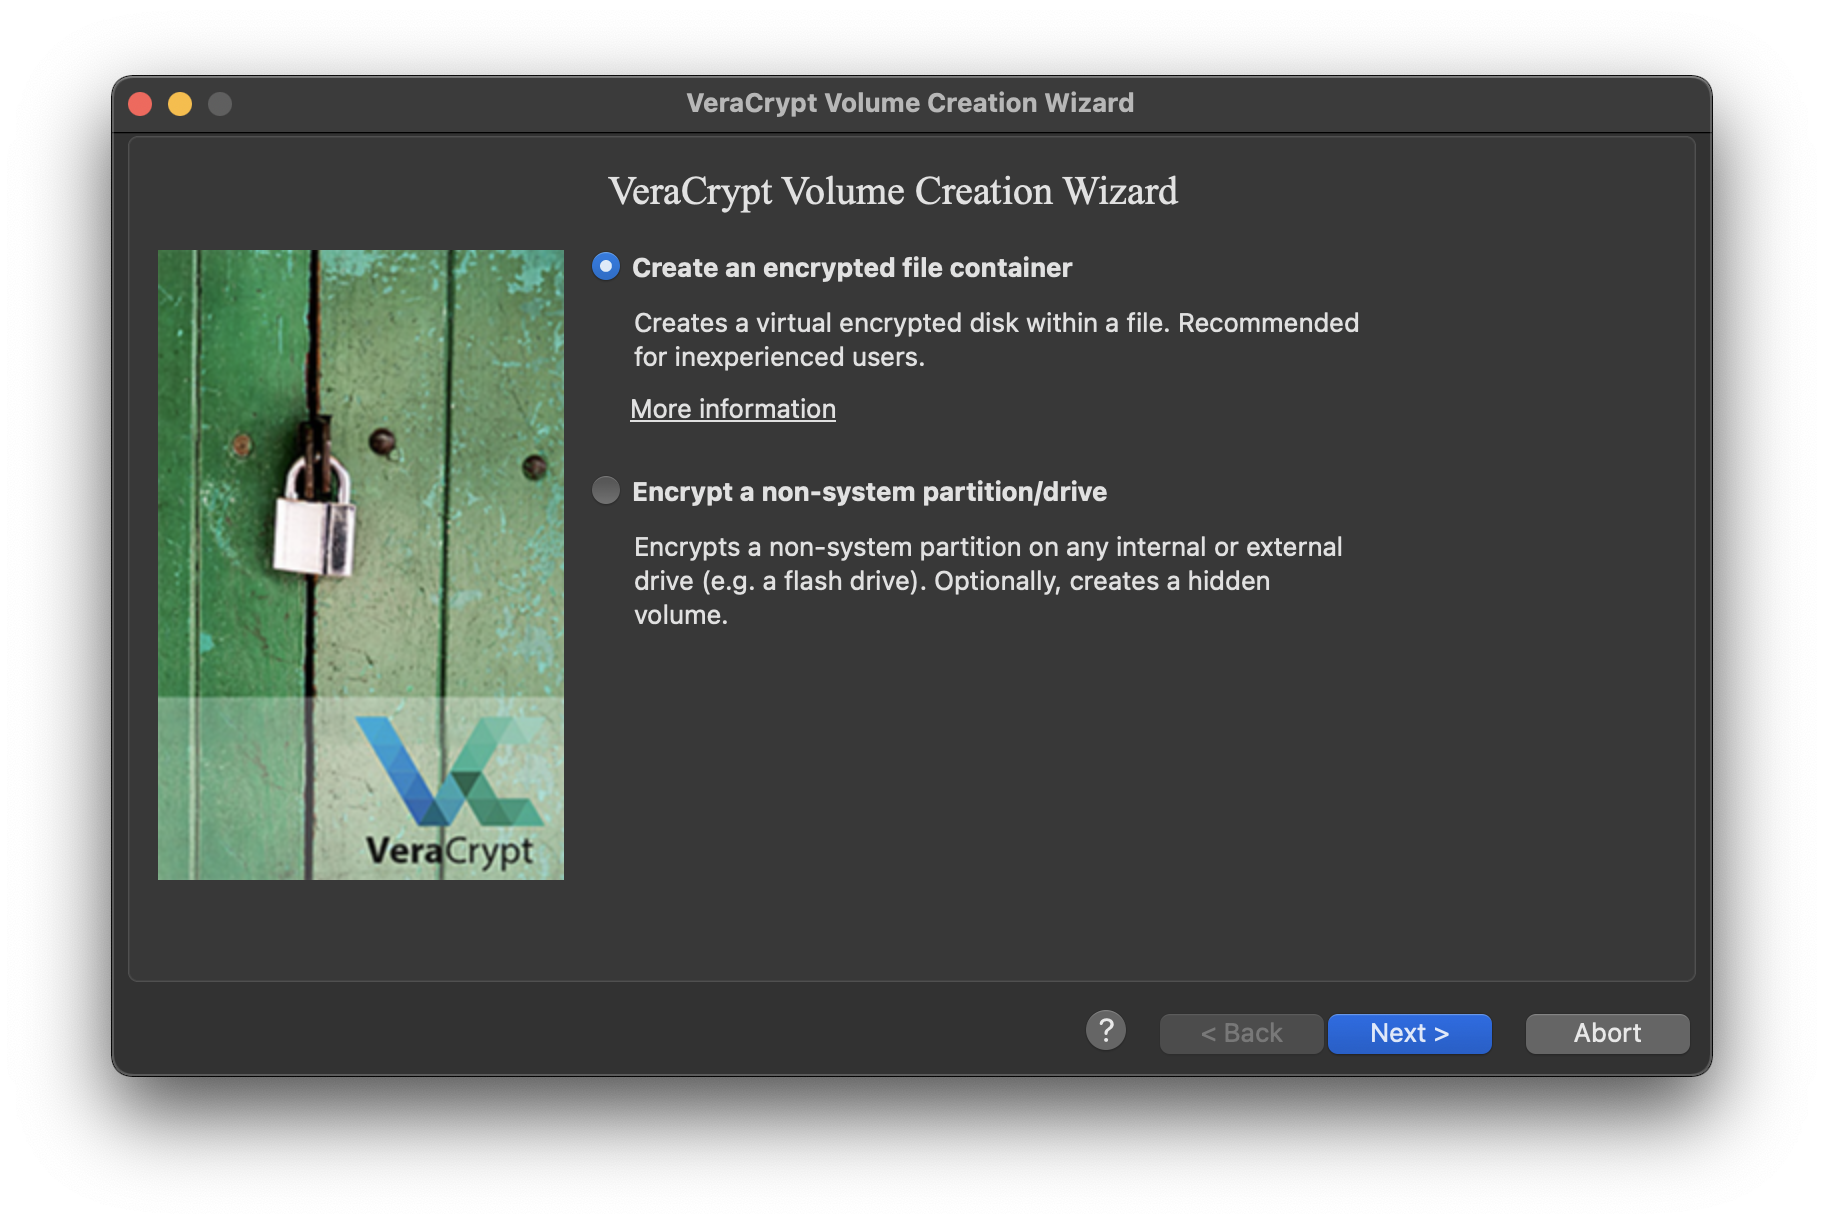
The first window of the Volume Creation Wizard gives you two high-level options for creating VeraCrypt volumes. We’re considering creating a space to hold a few highly sensitive files, so we’ll go ahead and select the “Create an encrypted file container” option.
Writer's note: The remainder of the steps in the file container provisioning process are nearly identical to the device encryption workflow we describe above, so we've opted to detail the configuration steps below without screenshots.
Volume Type: Stick with the default option here, which is our "Standard VeraCrypt volume.
Volume Location: This is where you designate where you’d initially like the file container saved. You can move it anywhere you like after it’s created, but for now we’ll save the container to Desktop with the name project.
Encryption Options: Stick with your defaults here. AES and SHA-512.
Volume Size: Your volume size will dictate the storage capacity of your file container. You can pick any size you’d like, so long as your computer has the free space on its hard disk to host it! For our purposes, 5GB volume size will give us the space we need to store sensitive files like interview transcripts and source contacts.
Volume Password: Input your long, unique password. Double check that you’ve saved it somewhere secure before moving to the next step.
Format Options: Select the “FAT” format option. This is the format you want for a volume under 32GB that will only handle smaller files. For large files, choose exFAT.
Volume Format: With your volume password saved or memorized, and after generating entropy through your mouse movements on the window, go ahead and hit the “Format” button. Wait for Veracrypt to do its magic.
Return to your Volume Manager window to begin loading files into your new, encrypted file container.
Hit “Select File” and navigate to where you saved your file container. In our example, we’ve named the container project, and saved it to our Desktop. With our file container located, we’re ready to select “Mount” — input your passphrase and wait as the container is decrypted.
With our file container now decrypted and mounted, we can begin adding files. We do this by opening up a Finder window, with our file container showing up under Devices. In this example, we’re loading a backup of a few highly sensitive files for an upcoming project.
When we’re finished loading up our files, we can return to the VeraCrypt Volume Manager to encrypt our container. Highlight the volume name, and simply click on the “Dismount” button on the lower right-hand side of the window. And with that, you’re done!


